WooCommerce Product Import Guide

Follow this step-by-step guide to easily import your prebuilt WooCommerce products.

  1. Unzip the Downloaded File

    After you complete your purchase you will get a zip file. The ZIP file contains three important files:

    • Products CSV File – Contains all product details for upload.
    • Instruction TXT File – Step-by-step guidance document.
    • License Plugin File – Required for activation (install only once).
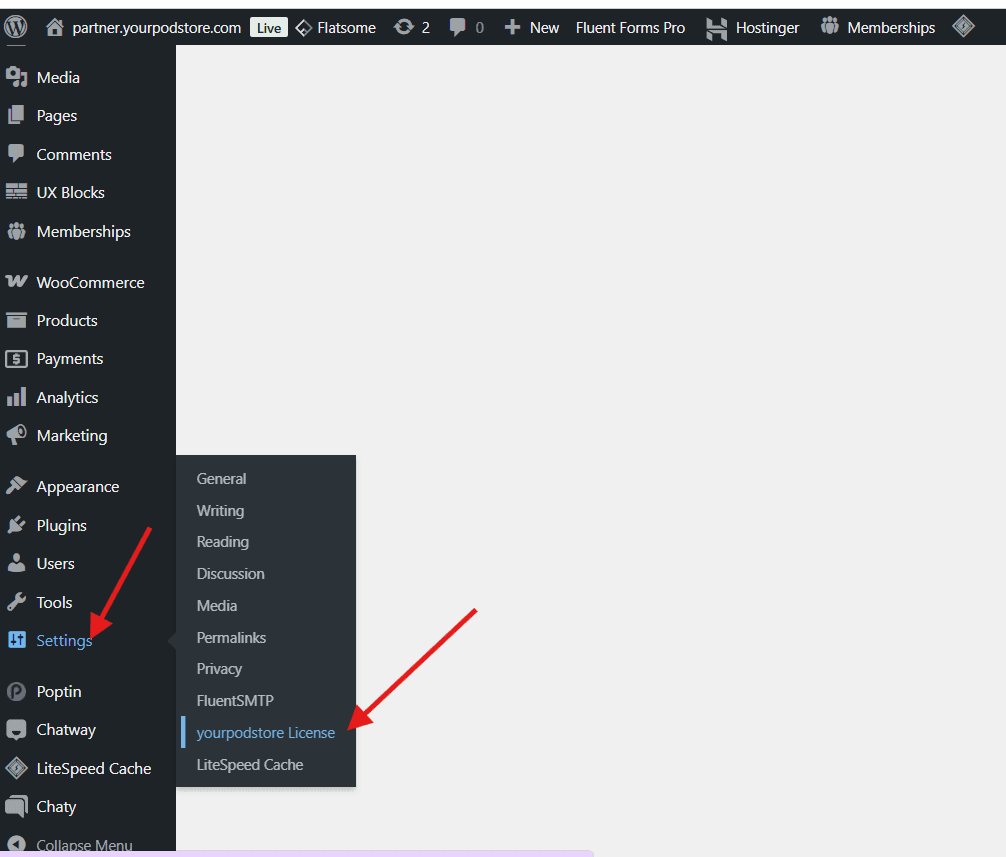
  2. Install the License Plugin

    Go to Plugins → Add New → Upload Plugin → Select the ZIP file → InstallActivate.

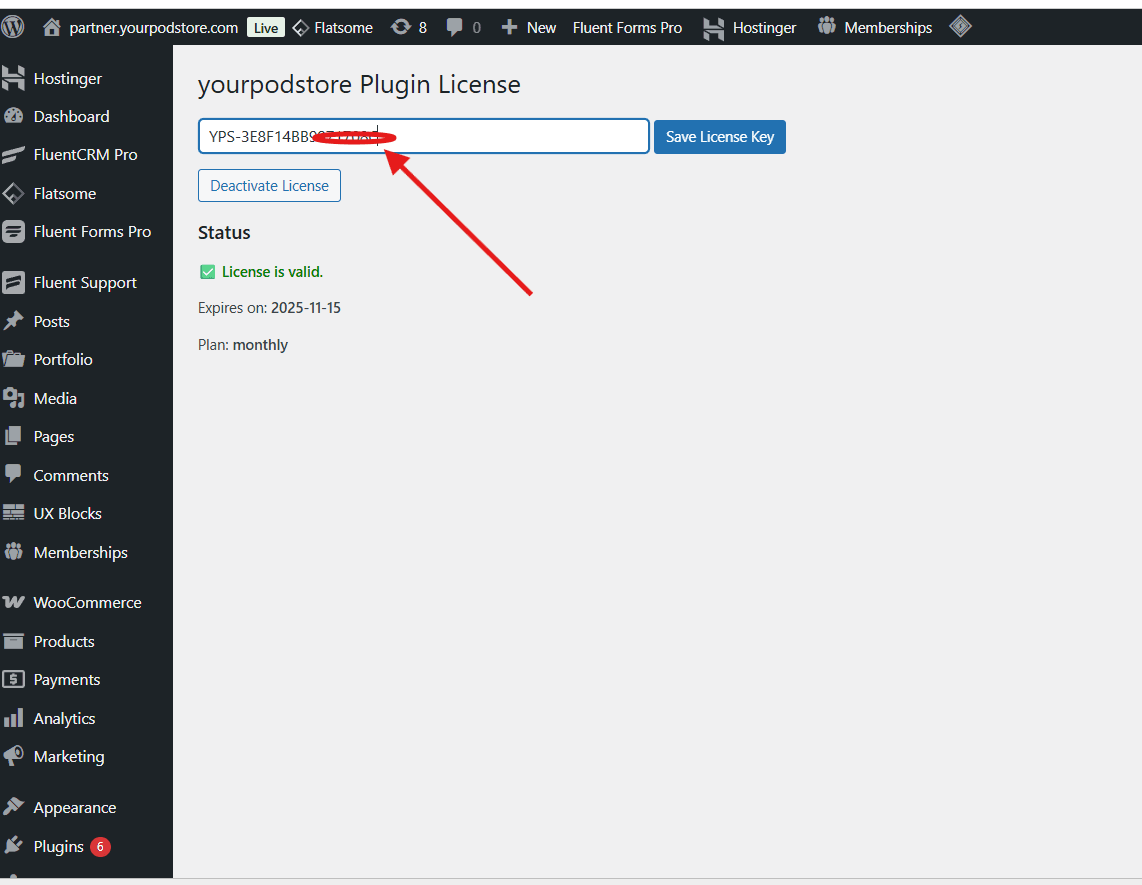
    Your license key will be sent to your registered email or can be found in your account dashboard. Enter the key to activate.

    License Activation Screenshot
    License Activation Screenshot
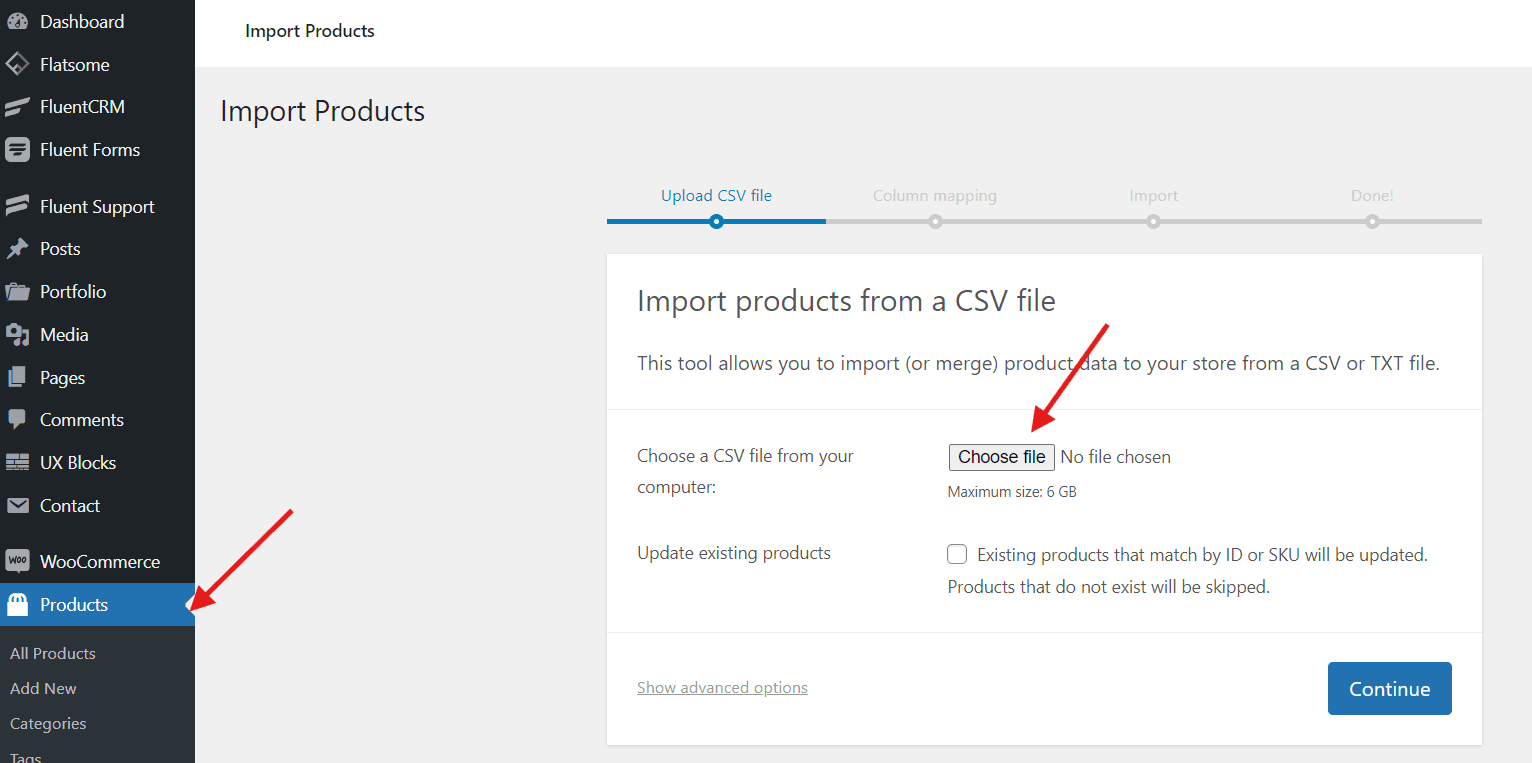
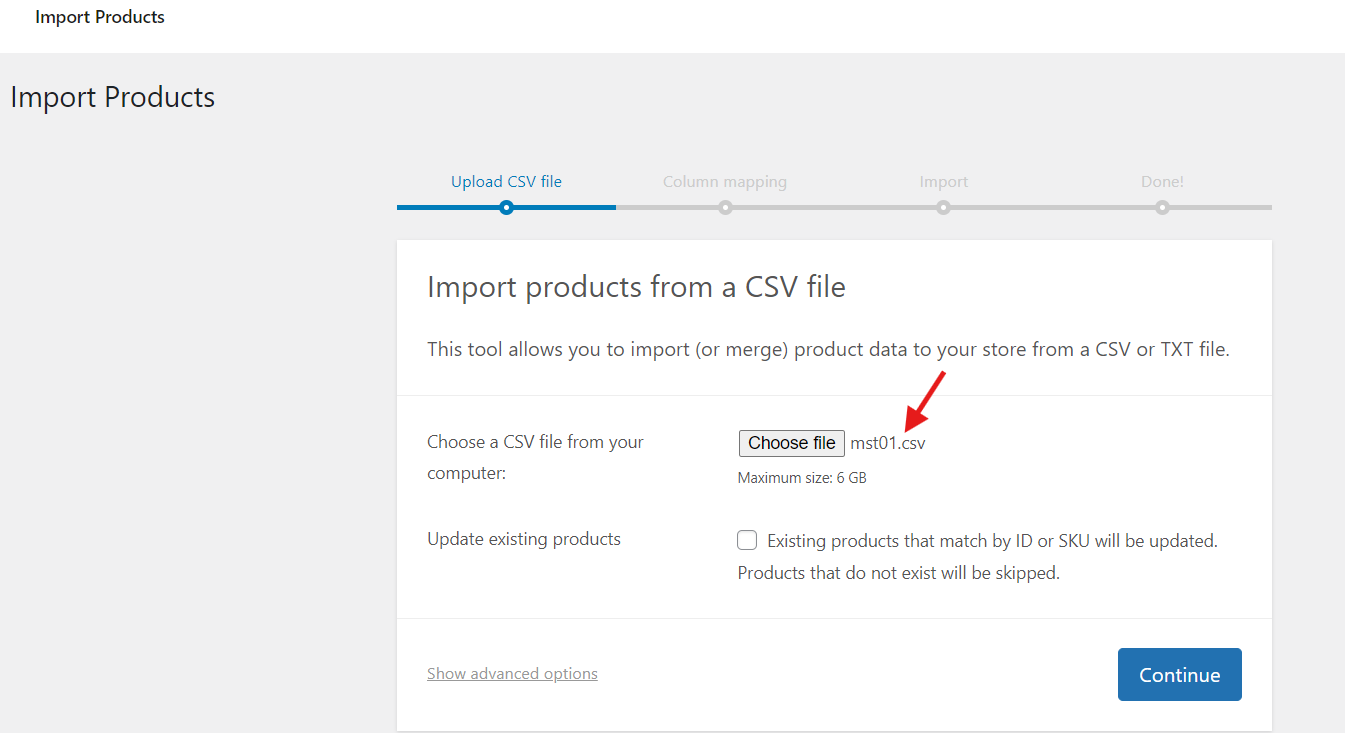
  3. Upload the Product CSV File

    Go to Dashboard → Products → All Products and click the Import button.

    Import Button Screenshot

    Select the downloaded CSV file and click Continue.
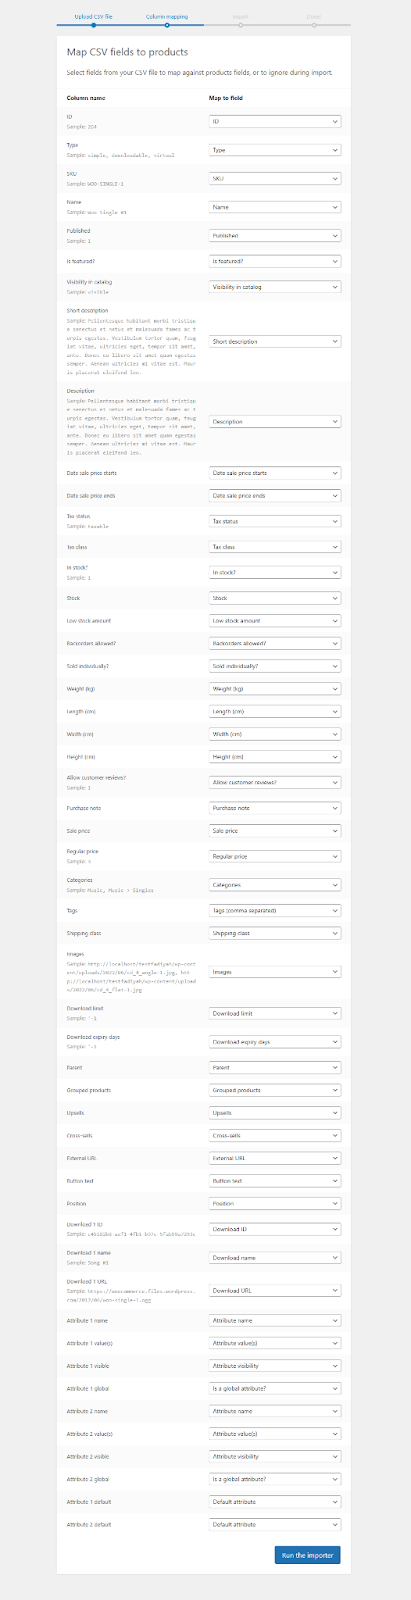
    CSV Upload Screenshot
    CSV Upload Screenshot
  4. Map Your CSV Fields

    In the next step, match the CSV fields to WooCommerce product fields.

    If unsure, don’t change anything — just click Run the Importer.

    Field Mapping Screenshot
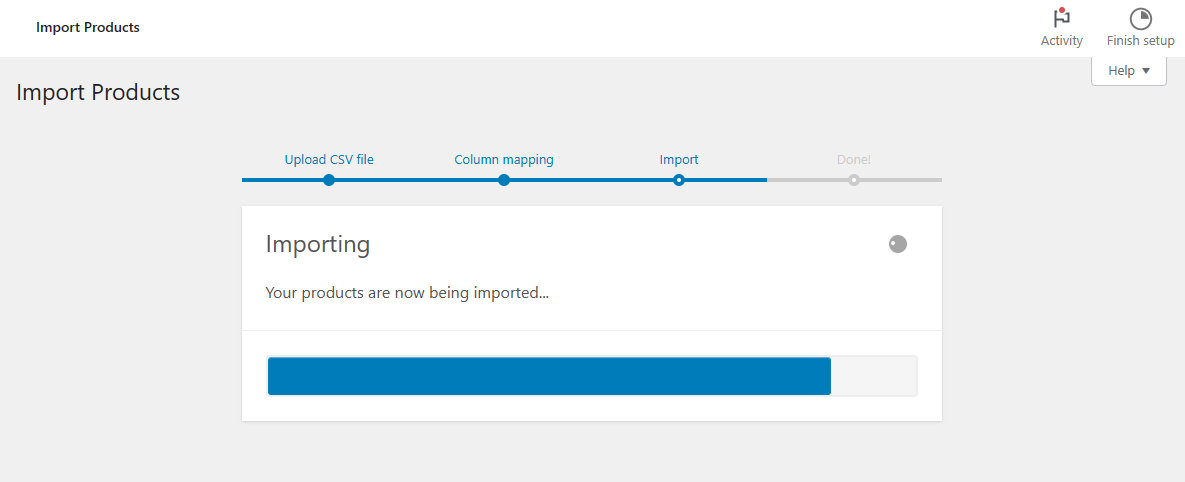
  5. Wait for the Import to Complete

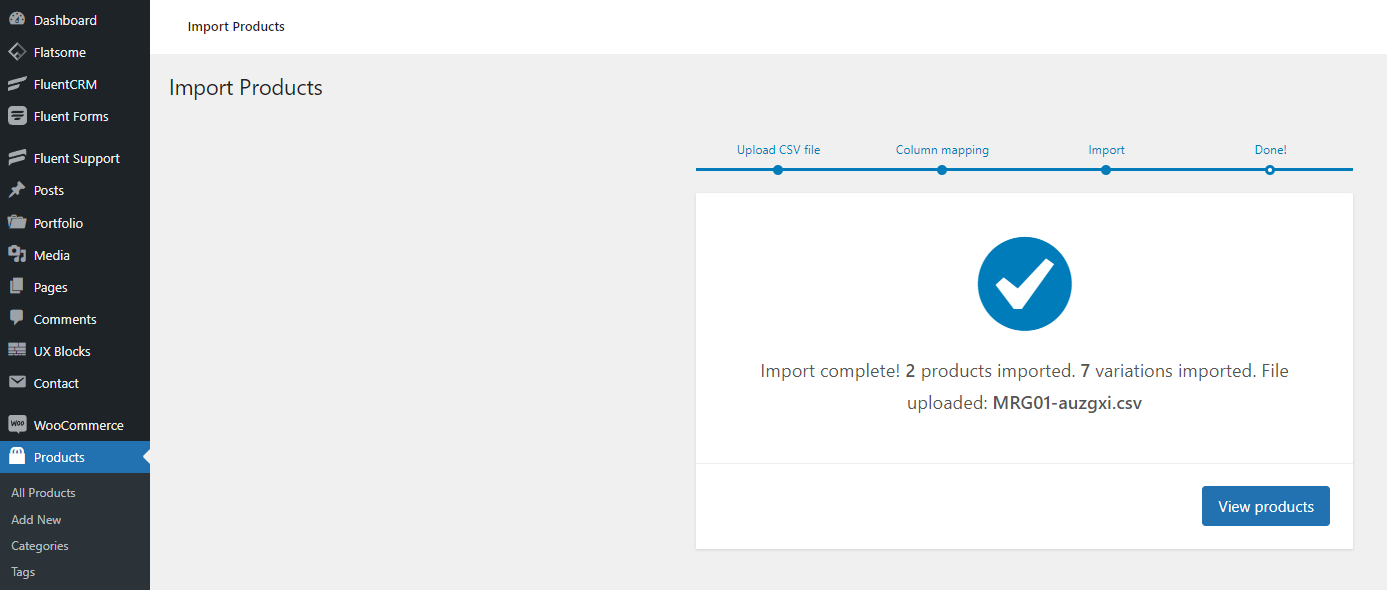
    The process may take a few minutes depending on file size and server speed. Once done, you’ll see a completion screen.

    Import Complete Screenshot
    Import Complete Screenshot

    Click View Products to confirm a successful import.

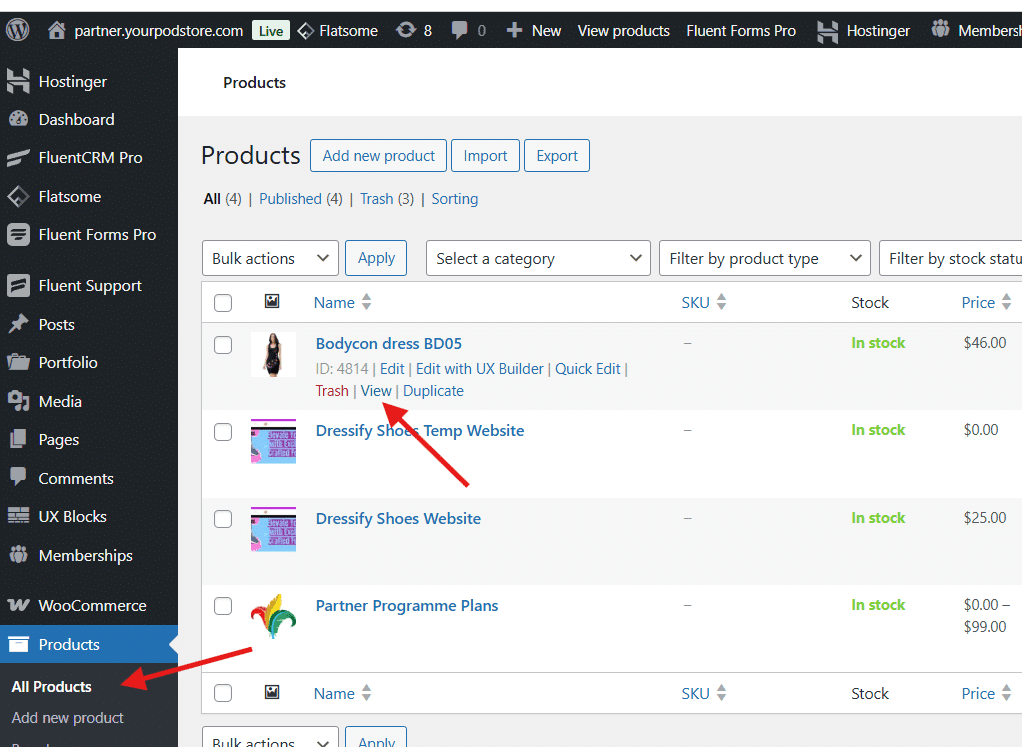
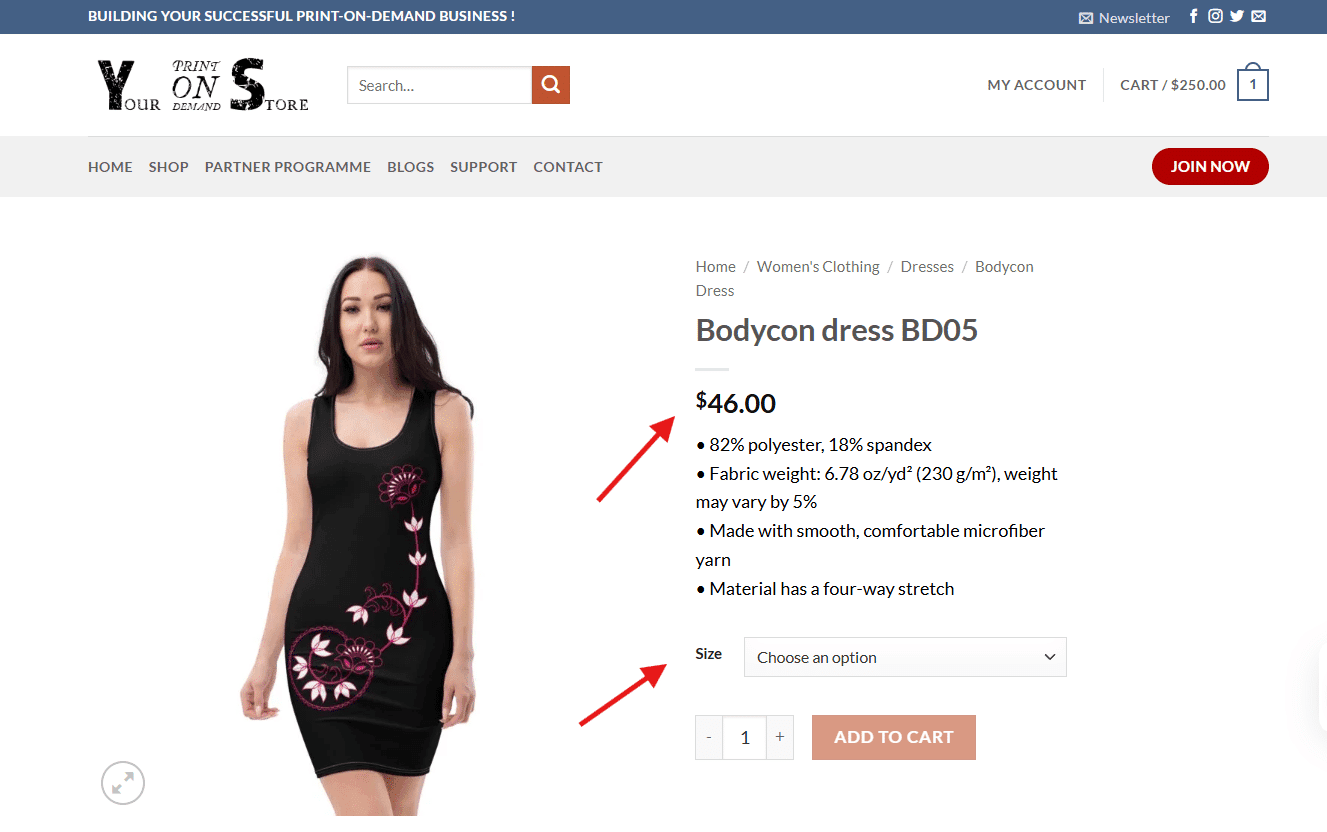
  6. Check the Imported Products

    Click View next to any product (e.g. ID: 3612 | Edit | Quick Edit | Bin | View | Duplicate).

    View Product Screenshot
    View Product Screenshot

    Ensure product details and images appear correctly.

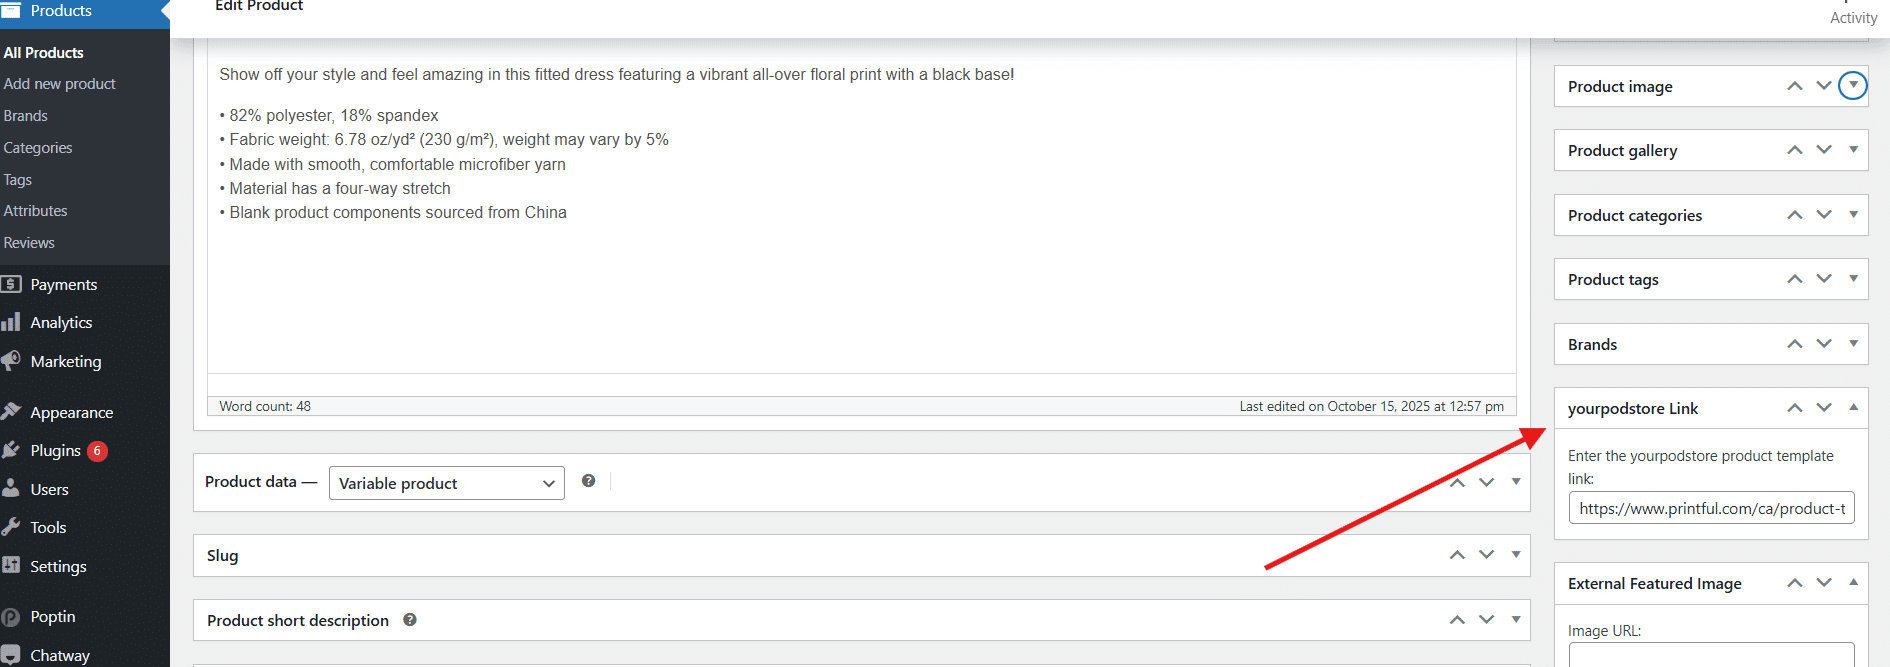
  7. Edit Prices and Product Details

    Update prices based on your margins and edit descriptions as needed.

    Check the yourpodstore link section and confirm your Printful product link (e.g. https://www.printful.com/ca/product-template/80975682/xxxxxxxxx).

    Printful Link Screenshot

    Click Update to save changes.

  8. Your Product is Ready for Sale!

    🎉 Congratulations! Your products are live and ready to sell on your WooCommerce store.

    To learn how to fulfill orders via Printful, visit: How It Works

Your uploaded CSV file contains  Product related information: product data and images, along with additional relevant data.
 
1. Product Data: This section includes the detailed information about the products that you plan to sell on your website. Before listing these products for sale, you will need to update their prices. The updated price should factor in:
   – Cost Price: The original cost of the product which you will be charged by the Print Provider.
   – Profit Margin: The amount you wish to earn from each sale.
   – Shipping Costs: Any expenses incurred for shipping the product to the customer.
   – Taxes: Applicable taxes that need to be added to the final price.
By adjusting these components, you can set a selling price that ensures profitability while covering all necessary costs.
 
How to Set Your Selling Price:
1. dentify the Product Cost: This is the price the print provider charges you. For example, if the cost is $29.00, this is your base cost.
2. Add Your Profit Margin: Decide how much profit you want to make. For example, if you want a 50% margin, add $14.50 to the cost.
3. Include Shipping Costs: If shipping is $3.99, add this to the total price. 
4. Calculate the Total Selling Price: In this example, your total selling price would be $47.49 ($29.00 + $14.50 + $3.99).
5. Offer Free Shipping: We recommend including the shipping cost in your price and offering free shipping to your customers. If you decide to charge extra for shipping, do not include it in the product price.
By following these steps, you’ll have a clear and profitable selling price for your website.